Mini-Phyling V2
Mini-Phyling V2
Overview
A Mini-Phyling is 20g of electronics designed to fit on any existing equipment. It records locally or sends data in real time over Bluetooth, making it a versatile, miniature tool.
All Mini-Phyling units from serial number 362 onwards are V2.
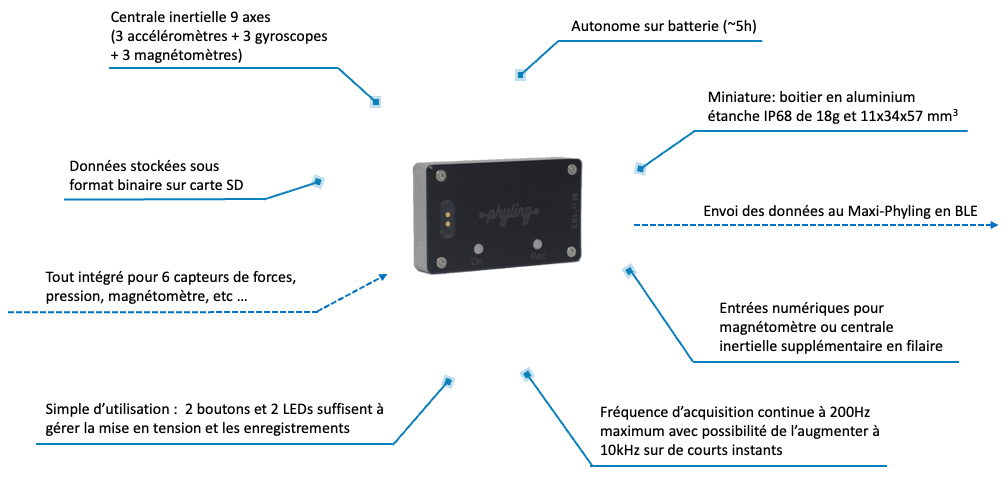
Technical specifications
| Specification | Value |
|---|---|
| Dimensions | 57x34x11 mm |
| Weight | 20g |
| Battery life | 13h (without additional sensor) |
| Connectivity | Bluetooth (BLE) |
| Sampling rate | Up to 200 Hz |
| Onboard sensors | 3-axis accelerometer, 3-axis gyroscope, 3-axis magnetometer |
Quick start
Press the ON/OFF button for 0.5s to turn it on; the LED turns green. It connects to the Maxi-Phyling automatically. To start a local recording on the SD card, press the REC button; the LED then turns blue. Recording to the SD card and sending data over Bluetooth are independent.
LED color code
- ⚪ White: the Mini-Phyling is initializing or shutting down
- 🟢 Green: the Mini-Phyling is ready to start a recording
- 🔵 Blue: the Mini-Phyling is recording data to the SD card
- 🟡 Yellow: the Mini-Phyling is in USB mode
- 🔴 Red: there is a problem, indicated by the number of blinks before shutdown
- x2: Configuration error (invalid module, badly formatted file, etc.)
- x4: SD card full: you can empty it manually in USB mode or in hotspot mode
- x5: Settings file error (Device, Calibration files, etc.)
- No blinking: Other problem
- Fast green blinking: the Mini-Phyling is not connected over Bluetooth
- Red blink of 0.5s every 5s: less than 15% battery remaining
- Red at power-on before initialization: there is an initialization error; turn the Mini-Phyling off and on again. If the problem persists, check the configuration files (see USB mode).
Powering on and recording
The Mini-Phyling has 2 buttons: an ON/OFF button and a REC button.
- To turn the Mini-Phyling on or off, hold the ON/OFF button for 0.5s
- To start or stop a recording, press the REC button
- A long press of 3s on the ON/OFF button while the Mini-Phyling is off switches it to USB mode to access the recording file and the Mini-Phyling configuration.
Data is automatically saved every minute, so if the device stops because of a low battery or is switched off, only the last minute of recording is lost.
Charging
The Mini-Phyling charges only with the magnetic power cable supplied by Phyling. An LED next to the charger indicates when the Mini-Phyling is charging and turns off when charging is complete.
Inertial measurement unit (IMU)
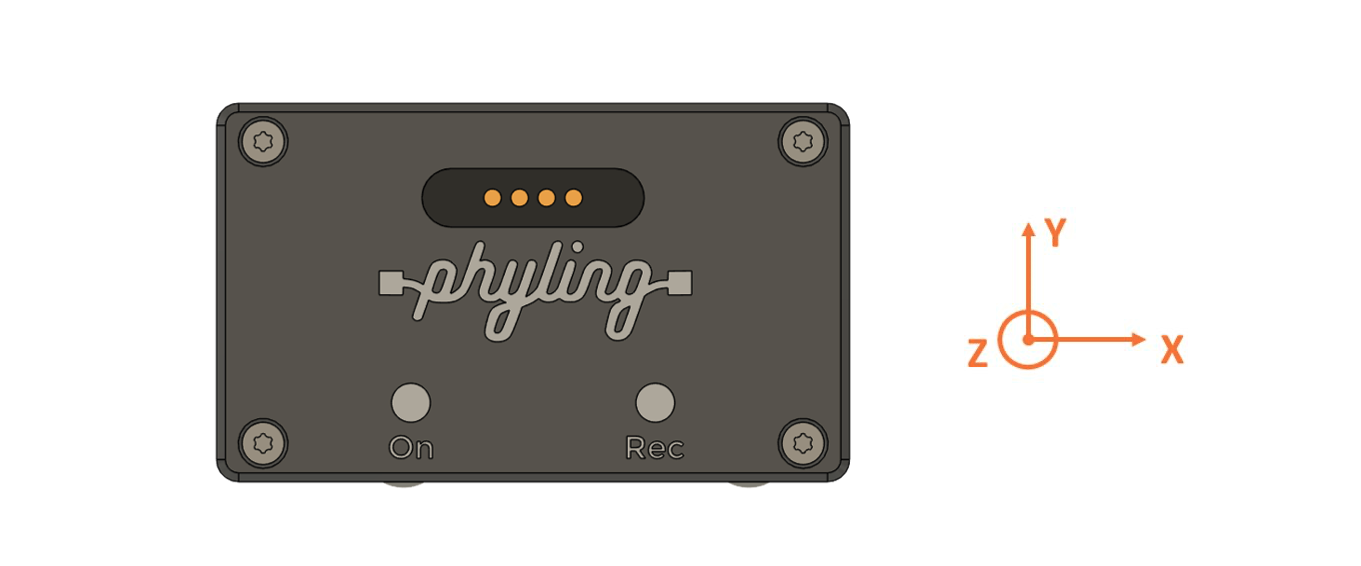
The orientation of the unit is the same as for the Maxi-Phyling (see Maxi-Phyling IMU section). It can send back up to 6 data channels (3 accelerometers and 3 gyroscopes) depending on its configuration.
Data retrieval
Over Bluetooth, data is sent in real time to the Maxi-Phyling.
USB mode & Cloud transfer
Connect the Mini-Phyling power cable to a USB-A port on a computer. With the Mini-Phyling off, press and hold the ON/OFF button until the LED turns yellow. The Mini-Phyling is then in USB mode. The computer will detect the Mini-Phyling as a USB drive. You can access all the recordings stored on it. Go to the DATA/ folder to find a recording.
To exit USB mode, restart the Mini-Phyling.
To import an activity into the Phyling Cloud application, simply open the application in a web browser at app.phyling.fr and log in with your username and password. In the application, go to the "Data" tab, click the "Import" button (cloud shape) above the data table and select the recording's txt file to import.
Configuration
Mini-Phyling units are configured by Phyling before delivery. The configuration is in the CONFIG/CONFIG.JS file, accessible in USB mode. For any question about reconfiguring a Mini-Phyling, contact the Phyling team.